Want to install and run Stable Diffusion locally on your Mac?
Ever since the announcement that Stable Diffusion would be released as open-source software, the internet has been raving about how it’s such a game-changer.
So it’s no surprise that thousands of Mac users from around the world have been trying to find out how to install Stable Diffusion on their systems.
In this guide, we’ll show you the quickest and easiest way to get Stable Diffusion (or a version of it) up and running on macOS.
Let’s dive right in.
Table of Contents Show
Like this content? Then share it!
How to Install Stable Diffusion on macOS
www.tokenizedhq.com
Here’s the answer. Great article by @ChrisHeidorn right here: https://tokenizedhq.com/how-to-install-stable-diffusion-macos/
How to Install Stable Diffusion in Under 5 Minutes
That’s right, there is an extremely easy way to install Stable Diffusion on your Mac, but there are some caveats.
Stable Diffusion may be the most rapidly adopted open-source project ever to be hosted on GitHub (30k stars within 90 days) but its learning curve is pretty steep.
In fact, not only is the Stable Diffusion ecosystem complex and confusing but getting it up and running on your local system can be an absolute headache if you try to do it the “techie” way.
But unless you absolutely want to have access to all the bells and whistles that you probably won’t really understand anyway (because of the technical language), there’s really no point in wasting your time.
You can check out our additional guide on how to install Stable Diffusion on macOS via Invoke AI.
It wasn’t exactly all self-explanatory I’m still recovering from that experience (spoiler: it was painful).
That’s why I’m going to show you how to install Stable Diffusion on macOS in the quickest and most user-friendly way you can imagine.
Now, I know I said this would take less than 5 minutes (and it will), but that assumes that you’re running a recent version of macOS.
I had to upgrade to macOS Ventura because Big Sur wasn’t enough.
If you already have the latest version, we can finally get started with either of the 2 options at your disposal:
- Option 1: Diffusion Bee
- Option 2: CHARL-E
Key Points (tl;dr)
- For non-technical people (i.e. no developer skills), the quickest way how to install Stable Diffusion on macOS is to simply download Diffusion Bee.
- Diffusion Bee eliminates 99% of the complexity and pain of installing Stable Diffusion via the command line while maintaining 80% of its features.
- If the spirit of Apple is simplicity and user-friendliness, then Diffusion Bee is what Mac users should use.
Option 1: Install Stable Diffusion via Diffusion Bee

At this stage, you might be asking yourself why you have to install Diffusion Bee if you want to use Stable Diffusion.
You can think of it this way: Diffusion Bee is to Stable Diffusion what Ubuntu is to Linux (it’s an implementation of the core software).
Anyway, those 5 minutes are running, so let’s get started:
- Step 1: Visit the Diffusion Bee website (https://diffusionbee.com)
- Step 2: Click the blue “Download for macOS” button.
- Step 3: Pick your preferred version. Personally, I had issues downloading the models for the HQ version, so I stuck with the regular Apple Silicon.
- Step 4: Once downloaded, unpack the .dmg file and drag Diffusion Bee to your Apps folder.
- Step 5: Launch Diffusion Bee and wait for the AI model weights to be downloaded (at least 8 GB in size).
Congratulations, you now know how to install Stable Diffusion on your Mac via Diffusion Bee.
You can now generate your first image by entering a prompt and clicking “Generate.”
Option 2: Install Stable Diffusion via CHARL-E

If for whatever reason you don’t like Diffusion Bee and you have an M1 or M2 Mac, then you also have a second option.
CHARL-E is another Mac application that packages Stable Diffusion into a simple app.
It doesn’t require a complex setup or dependencies and just works straight out of the box.
Here’s how to install CHARL-E (the name is a wordplay on DALL-E):
- Step 1: Visit the CHARL-E website (https://www.charl-e.com)
- Step 2: Click the big blue “Download CHARL-E” button.
- Step 3: Once downloaded, open the .dmg file and drag CHARL-E into your applications folder.
- Step 4: Launch the app and wait for the AI model weights to be downloaded (approx. 4 GB in size).
And that’s it, you now know how to install Stable Diffusion via CHARL-E as well.
Let your imagination go wild!
Diffusion Bee
Diffusion Bee is slightly more advanced than CHARL-E, especially since it also includes a high-quality version.
Although it isn’t as complex and flexible as traditional installations of Stable Diffusion, it does have quite a few features that are very easy to use via its interface.
Features include:
- Text-to-image generation
- Image-to-image generation
- Inpainting
- Outpainting
- Upscaling
- Support for custom models
- Advanced options (negative prompts etc)
Diffusion Bee seems to work with a wide variety of different specs, however, faster systems will obviously produce results more quickly.
Requirements:
- macOS 12.5.1 or higher
- Intel-based Macs are supported, but Apple Silicon (M1/M2) is recommended
- The more RAM the merrier, but 8 GB on an M1 MacBook Air seems to be fine.
CHARL-E
CHARL-E is a good alternative for those of you who own an M1 or M2 Mac.
The creator of CHARL-E is working on a version that supports Intel-based chips but for the time being, Apple Silicon is a requirement.
CHARL-E’s interface is much simpler and a lot more like using DALL-E Mini.
Although you can configure the model, it doesn’t support more complex features such as Inpainting, Outpainting, Upscaling, or Image-to-Image generation.
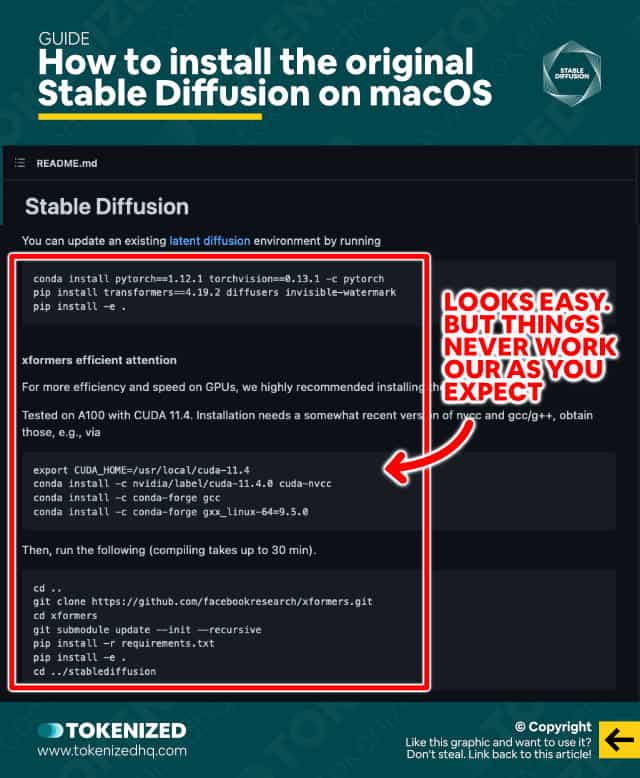
How to Install the Original Stable Diffusion
UPDATE: You can now find our dedicated step-by-step guide on how to install Stable Diffusion on macOS using the Invoke AI implementation. Alternatively, if you need access to Stable Diffusion 2.0, you can also install AUTOMATIC1111 instead.

I initially started off by trying to install the original version of Stable Diffusion, released by Stability AI and CompVis.
I then opted for the InvokeAI fork, since that comes with a slick web-based UI, including lots of helpful documentation on how to get it installed.
I first tried their all-in-one installer, which is meant to be really simple, but it constantly failed to install a certain dependency.
After diving down that rabbit hole and spending a disproportionate amount of time on Stack Overflow trying to find a solution to the problem, I ultimately gave up and decided to try InvokeAI’s manual installation instead.
Once I finally got Anaconda running on my system, I was able to follow the lengthy instructions and finally successfully install InvokeAI.
When the scripts tried downloading the models, I ran into a new error, only to find out that I had to update the scripts that came with the current version of InvokeAI.
So I did that and voilà, it finally worked.
Once all that was over, starting up the web-based UI is really simple and it gives you all the bells and whistles that you could possibly want.
That being said, I’m not entirely sure it was worth all the trouble and countless hours wasted whilst searching for solutions to irritating issues.
So why am I sharing all this?
If Stable Diffusion wants to gain widespread adoption among non-technical people, the installation process needs to get easier.
Technical people may be willing to endure all that, but they also have little empathy for how high the barrier to entry is.
If you just want to play around with Stable Diffusion a little bit then you’re better off sticking with solutions like Diffusion Bee.
Frequently Asked Questions (FAQ)
Before we close off this guide, let’s quickly address some of the most common questions related to how to install Stable Diffusion on macOS.
-
Can you run Stable Diffusion on an Intel Mac?
Yes, there are a number of implementations, including Diffusion Bee, that support Intel-based Macs. However, bear in mind that most Intel-based Macs lack the necessary processing power to effectively use Stable Diffusion. Expect long waiting times for your generations.
-
How can I run Stable Diffusion locally?
There are a number of ways you can run Stable Diffusion locally. Most developers and people with technical knowledge can try to install Stable Diffusion by cloning the official GitHub repository onto their system. However, this can be quite complicated and time-consuming. For most non-technical people, the quickest and easiest way to run Stable Diffusion locally on their Mac is to download Diffusion Bee.
-
How do I install Stable Diffusion on macOS?
The absolutely quickest way how to install Stable Diffusion on macOS is to download Diffusion Bee (a Mac-based implementation) and launch the app. You won’t have to worry about complicated setups or dependencies. It just works out of the box.
Conclusion
Although the open-source nature of Stable Diffusions is one of its biggest strengths, the technical orientation that comes with that is also its biggest weakness.
Open-source software often lacks the simplicity and user-friendliness that is necessary to reduce barriers to entry and Stable Diffusion is no exception.
That’s why this guide largely focuses on how to install Stable Diffusion on a Mac as quickly as possible.
Here at Tokenized, we want to help you learn as much as possible about the AI software industry. We help you navigate the world of tech and the digitalization of our society at large, including the tokenization of assets and services.


