Want to install and run Stable Diffusion locally on your Mac?
Maybe you’ve also come to realize that there are multiple different versions and implementations of Stable Diffusion.
If you’re looking for one with a particularly slick interface, then Invoke AI may have caught your attention.
In this guide, we’ll show you step-by-step how to install Stable Diffusion on macOS using the Invoke AI distro.
Let’s dive right in.
Table of Contents Show
Like this content? Then share it!
How to Install Stable Diffusion on macOS via Invoke AI
www.tokenizedhq.com
Here’s the answer. Great article by @ChrisHeidorn right here: https://tokenizedhq.com/how-to-install-stable-diffusion-macos-invokeai/
Brief Overview of How to Install Stable Diffusion on macOS

Chances are you got here via an earlier article that we wrote about how to install Stable Diffusion on macOS.
In that particular article, we provided step-by-step instructions on how to do it in under 5 minutes using a very user-friendly desktop application called “Diffusion Bee”.
Even though Diffusion Bee is a great place to start, user-friendliness obviously comes at the expense of functionality and control.
I briefly touched upon the installation process of Invoke AI, however, I did not provide a full guide simply because it’s unnecessarily complicated and I ran into tons of issues along the way.
Today, I’m going take another stab at it and show you how I successfully managed to install Invoke AI’s version of Stable Diffusion via the command line.
But before we start, let me give you a very quick overview of what’s going to happen, as well as some pre-requirements.
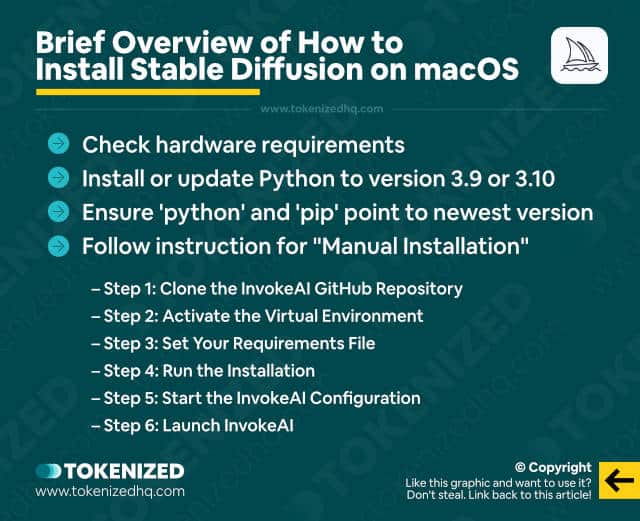
- Check whether your system meets the hardware requirements (check here).
- Make sure you’ve installed or updated your Python version to 3.10 (3.11 seems to be causing issues for some). I personally found this guide very useful.
- It’s absolutely critical that you have aliases set up in your command line environment so that
pythonandpipwill link topython3andpip3. The guide above will help you with that.
Invoke AI currently offers 3 different ways to install Stable Diffusion on macOS.
Unfortunately, the “Automated Installer”, which I guess is meant to be the easiest and most user-friendly way to install Invoke AI, never worked for me.
It always fails and critical points and it’s nearly impossible to properly debug what’s wrong.
The “Docker Installation” is probably one of the best options, but you need to be familiar with Docker works and I’m simply not experienced enough to even bother trying.
I opted for the “Manual Installation”, which I’m a lot more comfortable with and which is what I am going to guide you through today.
So let’s get started.
Key Points (tl;dr)
- Ensure that your system meets Stable Diffusion’s hardware requirements.
- Check your Python version and upgrade to 3.10 if necessary.
- Clone the InvokeAI GitHub repository, activate the virtual environment, and set the relevant requirements file.
- Finally, install and configure Invoke AI by following the instructions on the screen.
Manual Installation of Invoke AI Stable Diffusion

So at this point, I’m going to assume that you’ve checked the pre-requirements from the section above.
Double-check your Python version using the python -V command in your terminal window and as long as it’s 3.9 or 3.10.x, you’re good to go.
If it’s lower or higher, please upgrade or downgrade accordingly because as of today (17 January 2023), Invoke AI has issues with the very latest version of Python.
Step 1: Clone the InvokeAI GitHub Repository
Go to your terminal window and simply enter the following command:
git clone https://github.com/invoke-ai/InvokeAI.gitThis will close the official InvokeAI repository on GitHub and create a local folder called “InvokeAI”.
I generally recommend running this from your system’s home directory (~/).
Step 2: Activate the Virtual Environment
Next, you’ll need to change to the newly created directory:
cd InvokeAIAnd from here we’re going to create and activate a virtual environment name invokeai.
Run these commands:
python -m venv invokeai
source invokeai/bin/activate
Then make sure that pip is installed within your virtual environment and is up to date by running this:
python -m ensurepip --upgrade
python -m pip install --upgrade pip
Step 3: Set Your Requirements File
This next step is slightly different depending on whether you’re on Mac, Windows, or Linux.
But since this guide is only about how to install Stable Diffusion on macOS, I’m going to focus on that.
Inside the “InvokeAI” folder you’ll find a folder called “environments-and-requirements” that contains various different configuration files.
The one that’s relevant for us is called requirements-mac-mps-cpu.txt.
We’re now going to create a symlink to this file by entering the following command:
ln -sf environments-and-requirements/requirements-mac-mps-cpu.txtDepending on when you are reading this guide, new requirement files may have been introduced by now.
In that case, replace the reference to the text file in the command shown below with the new filename.
Step 4: Run the Installation
We’re now going to start the process to install Invoke AI using the requirements file that we’ve just set.
Just to be sure, re-run this command to activate the invokeai environment.
source invokeai/bin/activateAnd then run this:
pip install --prefer-binary -r requirements.txtThis process can easily take anywhere between 10-20 minutes depending on the speed of your connection and the server.
Don’t worry if it looks like things got stuck.
They are not stuck and it just takes a long time.
Step 5: Start the InvokeAI Configuration
In this step, we’re going to initialize a runtime directory that contains all the models, configuration files, and your outputs as well.
It makes sure that the runtime is kept separate from the source code and makes it easier to update.
You can specify a custom location if you want, by using the command below:
configure_invokeai.py --root_dir ~/Programs/invokeaiHowever, I went with the default and just ran this:
configure_invokeai.pyThis starts a process that walks you through downloading and installing the model weights for Invoke AI.
It’s mostly self-explanatory, except for the part where they ask you which models you would like to download.
You should know that if you download all the models, it will be more than 50 GB of files.
I did this and it took an eternity because the host server is extremely slow.
In hindsight, it would have been better to go with the “recommended” models, since they only amount to 10 GB.
I feel I also need to stress that Invoke AI 2.25 still DOES NOT support Stable Diffusion 2.
They are working on it but for the time being, you’re stuck with the older models.
If you want to start using Stable Diffusion 2 right now, then you’re probably better off checking out my guide on how to install Stable Diffusion on macOS via AUTOMATIC1111.
AUTOMATIC1111 is also a very popular Web GUI, it’s just not as pretty.
That being said, the installation process is a lot simpler.
Step 6: Launch InvokeAI
Once you’re done with the configuration process, you’re ready to get started with Invoke AI and Stable Diffusion.
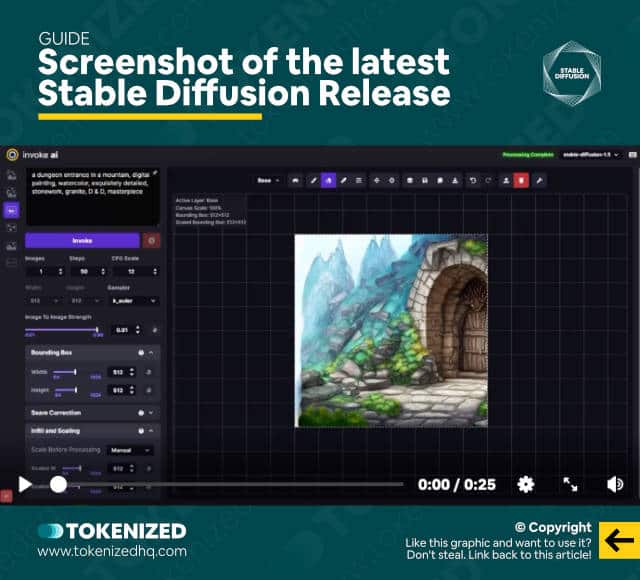
Most of you will want to use the Web GUI, so here’s how you launch it:
invoke.py --web --root ~/Programs/invokeaiBear in mind that --root ~/Programs/invokeai is only necessary if you’ve actually defined a different runtime folder.
You can leave it out if you’ve used the default.
The terminal window will give you the exact address at which you can open the Web GUI in your browser.
And that’s it, you now know how to install Invoke AI and you’re ready to go and create some AI art.
I would just like to stress that even though this works on a Macbook Air M1 laptop, it seems that the system isn’t able to effectively use the GPU’s VRAM.
So it will most likely just use the CPU to render images and this will make the process rather slow compared to what you may be used to from hosted solutions.
If you need more speed, you may want to get use HuggingFace or get a dedicated hardware setup.
Frequently Asked Questions (FAQ)
Before we close off this guide, let’s quickly address some of the most common questions on how to install Stable Diffusion on macOS via Invoke AI.
-
What is InvokeAI?
Invoke AI is an implementation of the AI art generator Stable Diffusion. Since Stable Diffusion is open-source, anyone can modify and improve upon its code and create their own variant of it. This is very similar to what is done with various different Linux distributions such as Ubuntu, Redhat, and many more.
-
How do I install Stable Diffusion locally on Mac?
In order to get the most out of Stable Diffusion, we recommend installing one of the two most popular Web GUIs for ease of use. Invoke AI is without a doubt the most visually appealing option, while AUTOMATIC1111 is sometimes considered easier to install.
-
Is InvokeAI better than AUTOMATIC1111?
It mostly depends on what is important to you. Invoke AI has a much prettier interface, while AUTOMATIC1111 is generally easier to install. Invoke AI also still does not support Stable Diffusion 2, while AUTOMATIC1111 does.
Conclusion
By now you’ve probably understood why Stable Diffusion, despite being free, still hasn’t been able to really break through to the masses.
Unless you are a developer or have a lot of technical experience, to install Invoke AI on your local system can be an absolute headache.
Obviously, these things will improve over time but it’s definitely holding people back for now.
Here at Tokenized, we want to help you learn as much as possible about the AI software industry. We help you navigate the world of tech and the digitalization of our society at large, including the tokenization of assets and services.


