Want to learn more about Multiprompt Image Blending?
You’ve probably heard of image blending and you’ve also surely heard of multiprompts in Midjourney before.
But do you also know what Multiprompt Image Blending or Blended Reverse Engineering is?
In this guide, I’ll show you what both of these novel and unconventional methods are and how they work in Midjourney.
Let’s dive right in.
Table of Contents Show

Like this content? Then share it!
Blend is Dead: Long Live Multiprompt Image Blending
www.tokenizedhq.com
Here’s the answer. Great article by @ChrisHeidorn right here: https://tokenizedhq.com/midjourney-multiprompt-image-blending/
Why /blend is Dead!
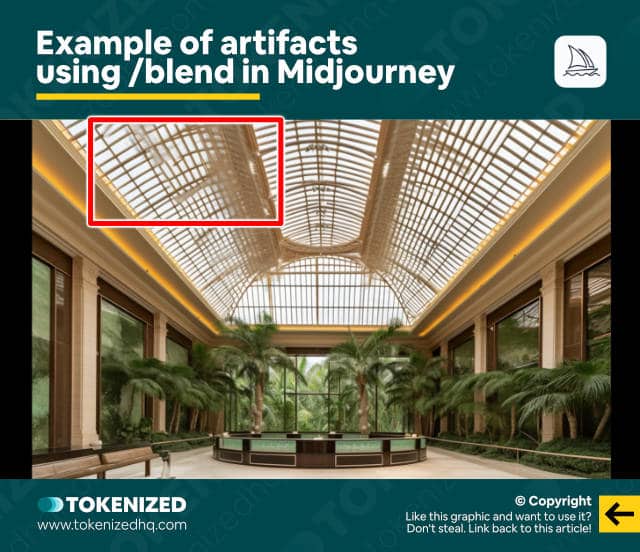
Blend is Dead.
Long live Multiprompt Image Blending.
That’s right, the popular feature that makes blending two or more images together so unbelievably simple doesn’t seem all that great anymore.
Not only is it unnecessarily limited in its functionality.
It just doesn’t produce particularly good results.
I mean, just look at the artifacts in the image above!
So what if I told you there was a much better way to do this?
A method that not only produces much cleaner results.
But one that also generates images that are far more creative and at the same time gives you full control over the final result.
Are you curious to find out more?
Well then stick around and I’ll show how it’s done.
And if you’re not really into reading, then feel free to watch this YouTube video instead.
Key Points (tl;dr)
- Although image blending can be a tremendously useful tool in Midjourney, it doesn’t always deliver the best results.
- But with a little help from Midjourney’s new
/describefeature, we can now use novel blending approaches such as Blended Reverse Engineering or Multiprompt Image Blending. - Not only do these prompting methods usually produce sharper results, but they also tend to be more creative than conventional image blends.
Novel Image Blending Methods for Midjourney
So today I’m going to walk you through a number of different examples of how to use this method.
Each example will represent a particular type of case where you might be tempted to blend 2 images together.
Midjourney’s blend command, which is nothing but a more user-friendly way to use image prompts, is really great if you just want to mix some concepts.
However, it usually falls flat when it comes to producing crisp images.
I’ll show you what I mean in a minute.
But first, let’s take a look at the images that I picked for this example.
The Greenhouse Hotel Lobby
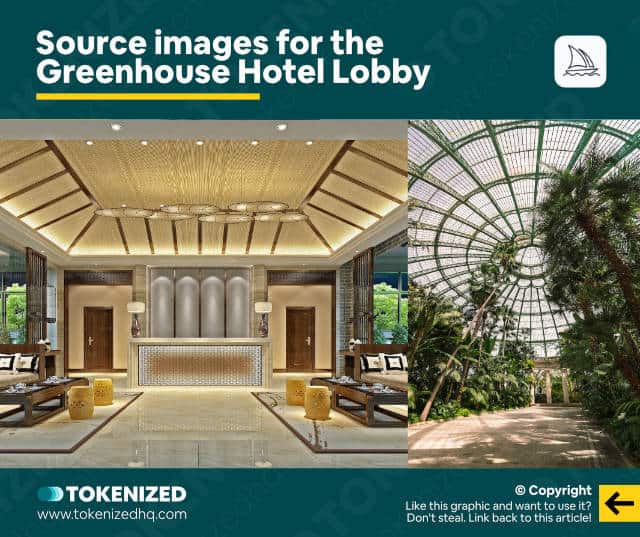
My first image is of a slick hotel lobby.
I got this image from Unsplash.
And I would like to blend this concept with another image that I found on Unsplash.
It’s a photo of the Royal Greenhouses of Laeken in Brussels, Belgium.
Traditionally, if I wanted to blend these 2 images in Midjourney, I would have 2 ways of doing this.
- Option 1 would be to simply copy the image URLs and add them as image prompts in a classic
/imaginecommand. - Option 2 is to use the
/blendcommand and let Midjourney do its thing.
Both options aren’t great but /blend is particularly annoying because you have little control over additional parameters.
I wasn’t even able to manually add --v 5 to this one.
And then you end up with images that often have issues.
Remember those horrible artifacts that I mentioned at the beginning?
And due to the different formats of the images, you also get those ugly cut-off edges.
The good news is that there are a number of much better ways to do this.
And they all involve the use of the /describe command as well as multiprompts.
Let’s start off with the easiest method.
Blended Reverse Engineering
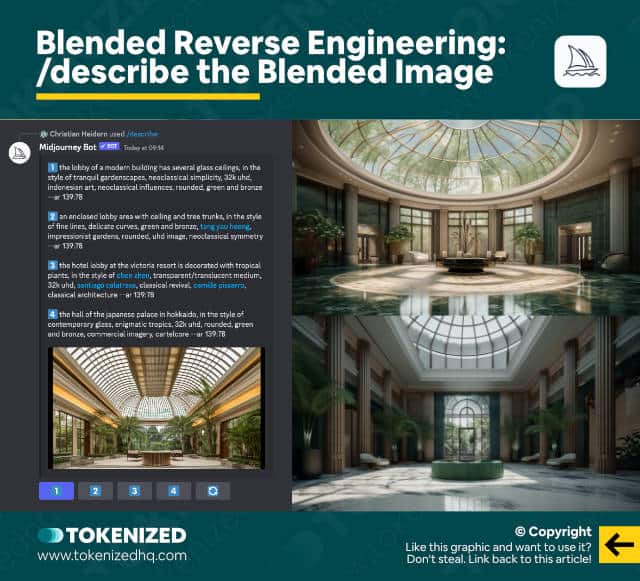
Let’s say you kind of like the blended images you got from the traditional way of doing things.
You just want something that looks crisper and has more variation to it.
What you would do is you would take one of the blended images and you would ask Midjourney to describe it.
I’m going to use one of the images with artifacts for our example.
After a few seconds, it provides me with the 4 starter prompts shown above.
You can then pick whichever prompt you like best.
I went with the first one and then hit the “1” button.
And you can also the first images it generated for me above.
I think we can all agree that these are stunning images.
Here are some more sets.
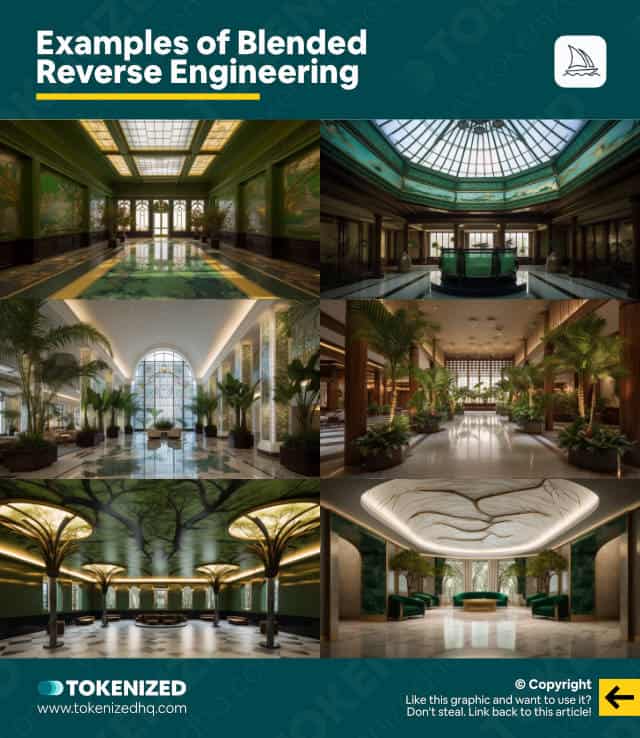
I know for some of you this might already be a big leap forward.
I’m pretty sure not many people have considered using /blend and /describe in this particular combination.
But we can things one step further.
Multiprompt Image Blending
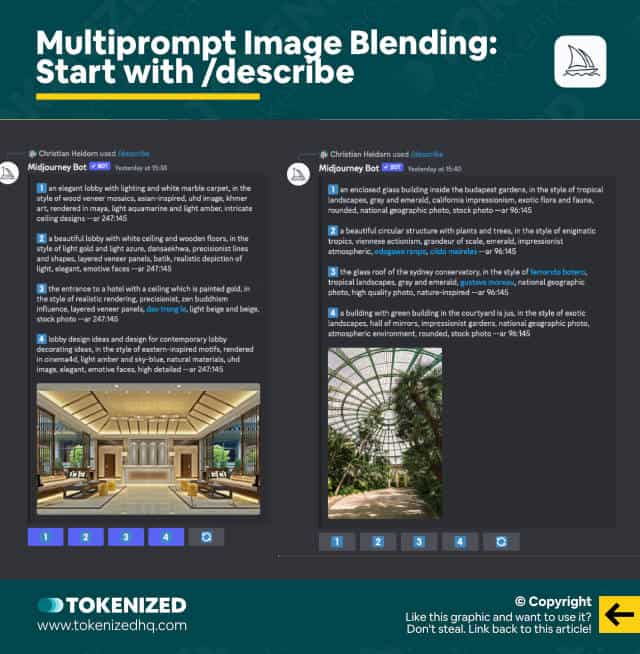
The next method I’m about to show you works very differently.
Instead of blending two images and then asking Midjourney to describe the newly generated image, we’re going to do it the other way around.
So let’s go back to our 2 initial images.
If I run each one of these through the /describe command, then I get the starter prompt suggestions that you see above.
At this stage you could try out different descriptions to figure out which one works best and accurately generates a similar image.
But I like to stay open-minded and usually just pick one that sounds good.
So in this case I picked #1 from the hotel lobby and #3 from the greenhouse.
I then use both of these to craft a multiprompt with 2 segments that look like this:
/imagine
an elegant lobby with lighting and white marble carpet, in the style of wood veneer mosaics, asian-inspired, uhd image, khmer art, rendered in maya, light aquamarine and light amber, intricate ceiling designs::
the glass roof of the sydney conservatory, in the style of fernando botero, tropical landscapes, gray and emerald, gustave moreau, national geographic photo, high quality photo, nature-inspired::
--v 5 --ar 16:9
I haven’t made any significant changes other than adding the version 5 parameter and defining the aspect ratio.
Technically, you could add whatever parameters you like and you could also adjust the weights of the segments.
But let’s go with this plain vanilla prompt first.
And here’s what I meant when I said that these methods produce far more creative results.
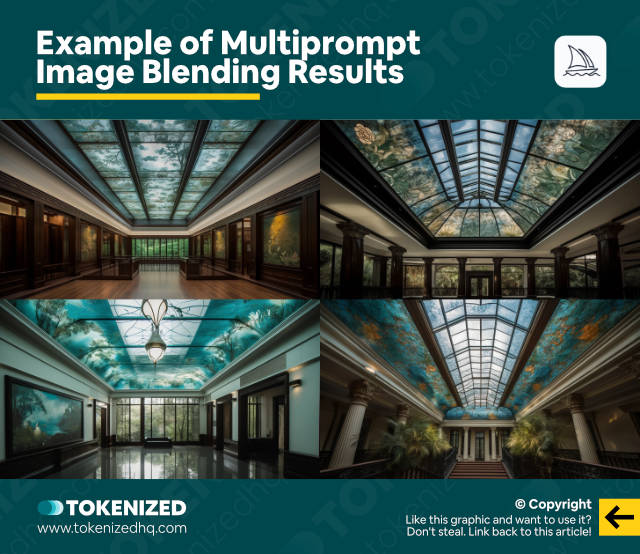
Just look at the beautiful ornamented glass ceiling.
By the way, this is a really great example of where Midjourney’s new permutations can be really helpful.
Iterating through different settings becomes so much easier this way.
Ok, so let’s say you’re not 100% happy with the images.
Well, obviously, you could make all sorts of changes to the prompt to reflect the exact camera angle or colors that you want.
Or you could simply play around with the weights of your segments, like this:
/imagine
an elegant lobby with lighting and white marble carpet, in the style of wood veneer mosaics, asian-inspired, uhd image, khmer art, rendered in maya, light aquamarine and light amber, intricate ceiling designs::2
the glass roof of the sydney conservatory, in the style of fernando botero, tropical landscapes, gray and emerald, gustave moreau, national geographic photo, high quality photo, nature-inspired::
--v 5 --ar 16:9
Note that the only thing I’ve changed in this prompt is the weight of 2 on the first segment.
This tells Midjourney to assign twice as much relative importance to the first segment, which represents the image of our hotel lobby.
And here’s what we get.
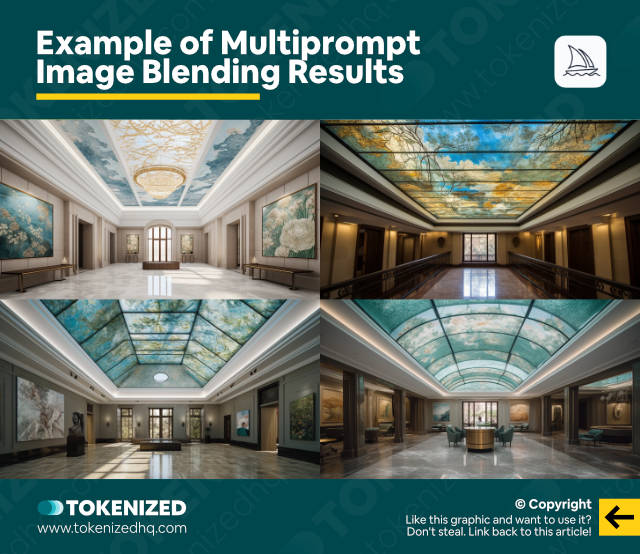
You can see that our glass ceiling is less important in these images and it looks less like a greenhouse.
The camera angle is also slightly more leveled, putting emphasis on the lobby itself.
Now let’s turn things around and put more relative weight on the second segment.
/imagine
an elegant lobby with lighting and white marble carpet, in the style of wood veneer mosaics, asian-inspired, uhd image, khmer art, rendered in maya, light aquamarine and light amber, intricate ceiling designs::
the glass roof of the sydney conservatory, in the style of fernando botero, tropical landscapes, gray and emerald, gustave moreau, national geographic photo, high quality photo, nature-inspired::2
--v 5 --ar 16:9
I’ve removed the weight of 2 from the first segment, so now it’s only 1.
And I’ve added a weight of 2 on the second segment instead.
We can expect the image of the greenhouse to play a much bigger role this time.
And lo and behold, that’s exactly what has happened.
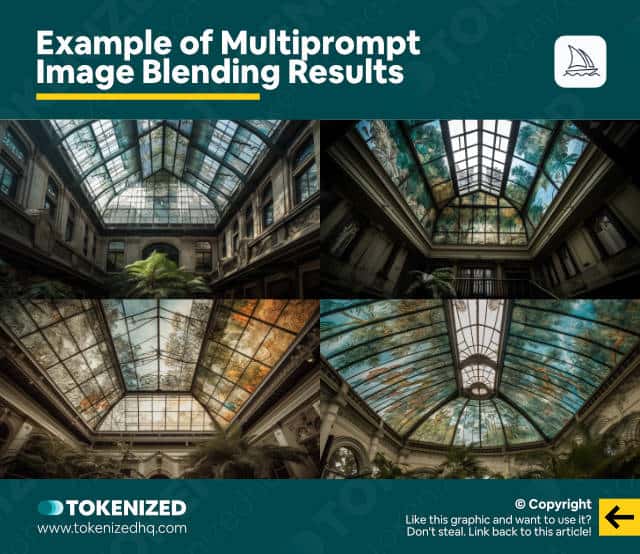
We get 4 images of beautiful greenhouse-like structures filled with ornaments.
The camera is looking up at the roof, just like the original image that we fed into Midjourney.
The only thing that bothers me a bit is that in some of the images, we have artifacts again.
So let’s try our trick from Method 1 one more time.
I’m going to feed the top-right image back into the /describe command.
And what I get are the following 4 starter prompts.
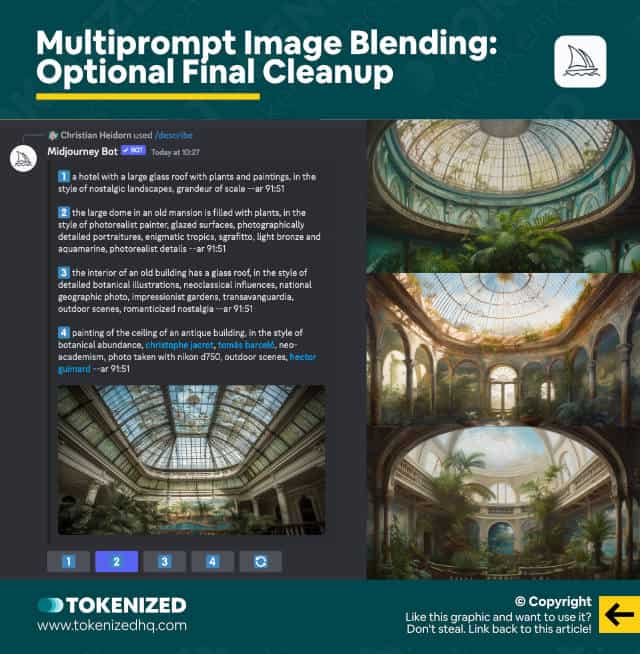
I then select #2 on the list and add the version 5 parameter and simply hit submit.
Not all of them might suit your specific needs, but remember, they are 100% based on a text prompt.
That means it’s relatively easy for you to simply make the changes that you need.
The entire process is far more versatile than any standard blending technique.
Alright, so it’s time to move on to another example.
Santorini in New York
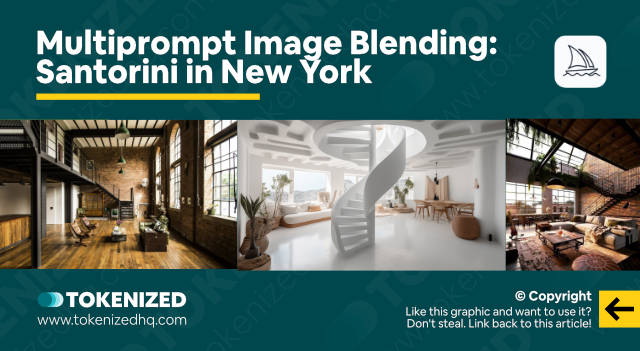
I know this might sound a bit contradictory, but bear with me here.
I want to create interiors that blend the styles of a New York industrial-style loft apartment and Santorini together.
And for this, I’m going to be using 3 different images.
The first 2 are real photos while the Santorini interiors were created straight within Midjourney.
Ok, so before we proceed, let’s see what we get if we simply blend all 3 images together.
/imagine
https://s.mj.run/MlWqrx495Ks
https://s.mj.run/ULn5GGurPnA
https://s.mj.run/y59h8VGZ2KY
--v 5 --ar 16:9
I’m not even going to use the /blend command here and instead, add all 3 image prompts and add my parameters, just so this method even stands a chance.
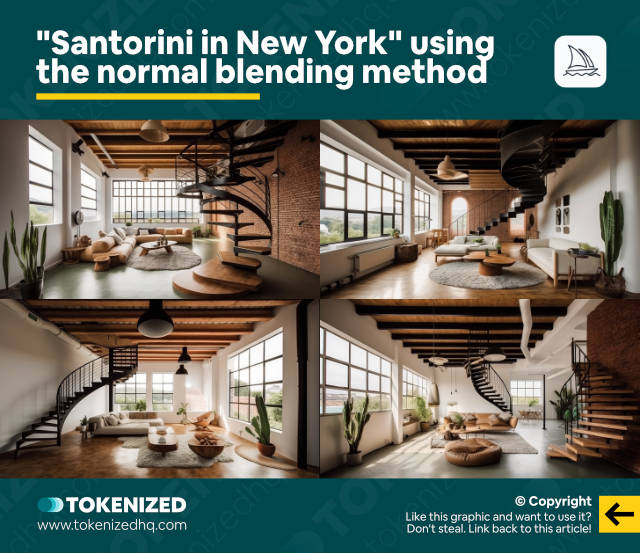
Even though these are actually decent interiors, they’re not really the style I’m looking for.
And once again, you can see how Midjourney begins to add things that just don’t make sense.
In all 4 images, the stairs are either malformed or they lead nowhere.
We could try to apply our first method of Blended Reverse Engineering and that would fix the issue of the malformed stairs, but it won’t give me the blended concept I’m looking for.
So instead, I ran the 2 original loft photos through the /describe command.
It gave me some good start prompt suggestions and I actually tested some of them to find the best ones.
I eventually decided to go with #4 on each one of them.
I get then put all of them together into one big multiprompt with 3 segments.
/imagine
large industrial space furniture design, in the style of earthy naturalism, exotic atmosphere, multi-layered, cottagepunk, sabattier filter, realistic yet romantic, use of earth tones::
a living room with wooden floors and brick walls, in the style of industrial landscapes, dark amber and green, dreamlike architecture, victorian glasgow, piles/stacks::
santorini holiday home with a helical staircase made of white metamorphic limestone in the center of the room::
--v 5 --ar 16:9
The first and second segments are from the described loft apartments.
While the third segment is the original text prompt I used to create the Santorini interiors.
Even though the lofts have more weight since there are 2 of them, I left all the weights at 1.
It gave me these 4 images I actually really like.
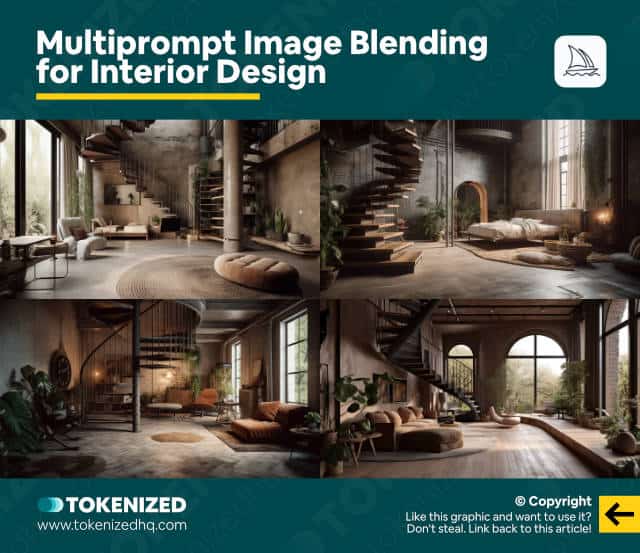
But none of them actually have the white limestone staircase that I wanted.
So maybe I do have to make changes to the weights.
/imagine
large industrial space furniture design, in the style of earthy naturalism, exotic atmosphere, multi-layered, cottagepunk, sabattier filter, realistic yet romantic, use of earth tones::
a living room with wooden floors and brick walls, in the style of industrial landscapes, dark amber and green, dreamlike architecture, victorian glasgow, piles/stacks::
santorini holiday home with a helical staircase made of white metamorphic limestone in the center of the room::2
--v 5 --ar 16:9
All I did was add a weight of 2 to the third segment, effectively matching the weight of the first two segments.
So now my interiors have a white limestone staircase and generally more organically-shaped elements.
However, they also no longer look like a New York-style loft.
So I decided to do something a bit more drastic.
Maybe even a little bit weird.
I took an image which was generated using one of the loft prompts and I also took this image from my Santorini interiors.
And then I had a little bit of fun in Affinity Photo.
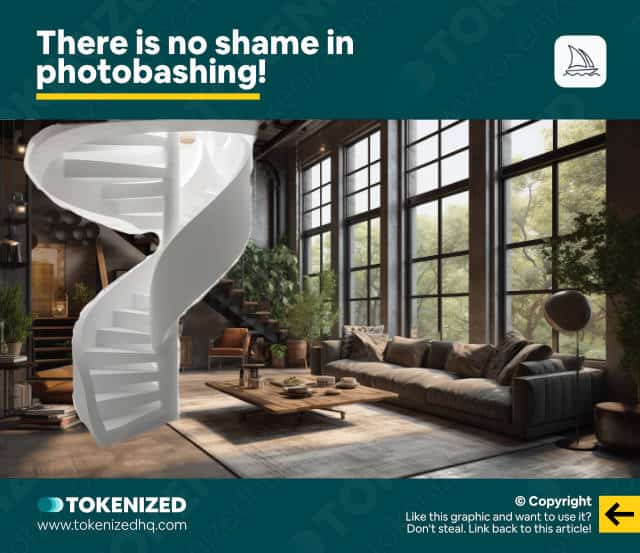
No, this is not meant as a joke.
This is also not meant to demonstrate any particular editing skills.
This is pure and simple photobashing.
I then took this beautiful new image and run it through the /describe command.
Mdijourney proposed some starter prompts, from which I picked the very last one.
And Midjourney then produced the following images based on that prompt.
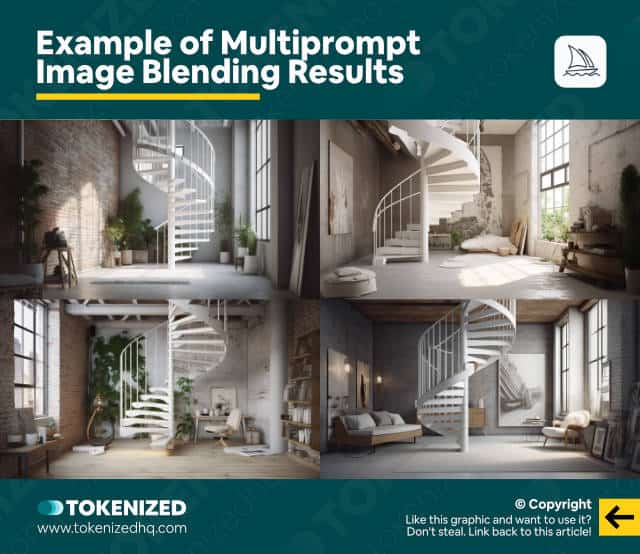
I’ll admit that the stairwell definitely isn’t made of limestone but at the very least, it’s white and it’s in a loft apartment.
So next, I took the text prompt from the first loft apartment and added the description for our photobashed image as a second segment.
/imagine
large industrial space furniture design, in the style of earthy naturalism, exotic atmosphere, multi-layered, cottagepunk, sabattier filter, realistic yet romantic, use of earth tones::
this white spiral staircase is stacked in a room, in the style of rustic scenes, vray tracing, industrial chic, earthy colors, romanticized views, living materials, stock photo::
--ar 16:9 --v 5
I’m hoping that it will keep most of the New York loft aesthetic but also use the white staircase.
In this example (not shown here), it definitely used the white color but not really the way I had hoped.
I then decide to make some manual adjustments to the text prompt.
/imagine
large industrial space furniture design, in the style of earthy naturalism, exotic atmosphere, multi-layered, cottagepunk, sabattier filter, realistic yet romantic, use of earth tones::
this white spiral staircase made of white organically-shaped limestone is stacked in a room, in the style of rustic scenes, vray tracing, industrial chic, earthy colors, romanticized views, living materials, stock photo::
--ar 16:9 --v 5
Notice how I add “made of white organically-shaped limestone” into the second segment.
This should signal to Midjourney that I want my staircase to be made of limestone.
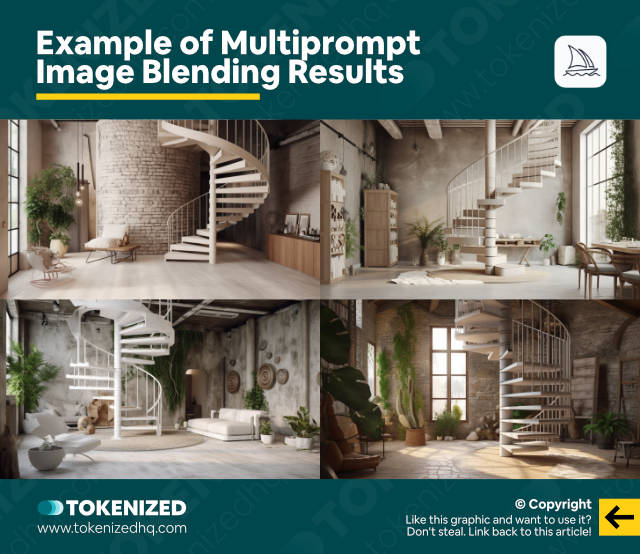
And sure enough, it definitely had an impact.
But the beauty of using multiprompts is that you can adjust the weights to your liking until you get exactly what you need.
/imagine
large industrial space furniture design, in the style of earthy naturalism, exotic atmosphere, multi-layered, cottagepunk, sabattier filter, realistic yet romantic, use of earth tones::
this white spiral staircase made of white organically-shaped limestone is stacked in a room, in the style of rustic scenes, vray tracing, industrial chic, earthy colors, romanticized views, living materials, stock photo::3
--ar 16:9 --v 5
So I used the exact same prompt as before and only adjusted the weight of the third segment.
With each increment, you’re increasing the relative importance of that particular segment.
While this can produce extremely interesting and aesthetic results, we’ve obviously distanced ourselves from our New York-style loft.
Or have we? Let’s try one more thing.
/imagine
large industrial space furniture design, white spiral staircase made of white organically-shaped limestone, in the style of earthy naturalism, exotic atmosphere, multi-layered, cottagepunk, sabattier filter, realistic yet romantic, use of earth tones::
new york style loft with high ceilings, white spiral staircase made of white organically-shaped limestone is stacked in a room, in the style of rustic scenes, vray tracing, industrial chic, earthy colors, romanticized views, living materials, stock photo::4
--ar 16:9 --v 5 --s 1000
I must admit that I did this on a hunch.
I added “white spiral staircase made of white organically-shaped limestone” to the first segment.
I also added “new york style loft with high ceilings” to the second segment.
And finally, I added “–s 1000” to get more creative results.
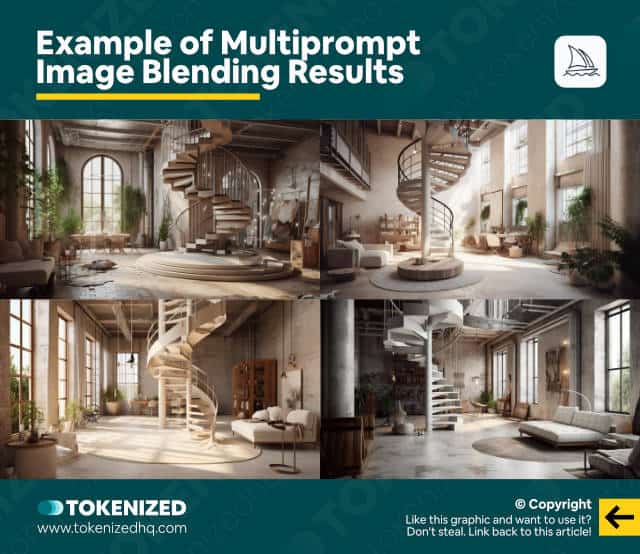
While the results aren’t perfect, I’m still quite happy with them.
It definitely looks a lot more like a loft now and my staircase is quite evidently very white.
It’s this sort of experimentation that I feel produces some of the most interesting results overall.
Rather than forcing Midjourney to generate exactly what you have in mind, why not be open to different options and pathways?
And by the way, these methods are not limited to interior design.
You can use them on pretty much any type of image.
Examples Multiprompt Images Blending
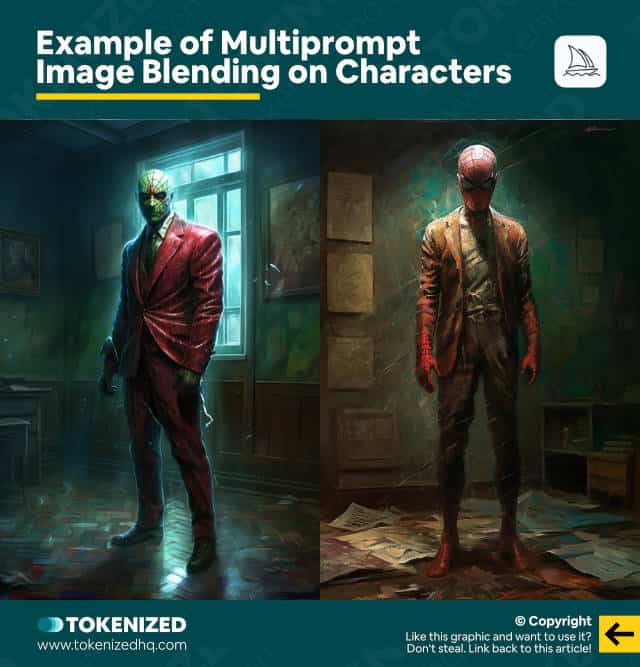
For example, I combined images of Spiderman and the Joker using the multiprompt image blending method.
Midjourney happily obliged and created Jokerman and The Spidy.
And of course, you can also apply these methods to landscapes and paintings as well.
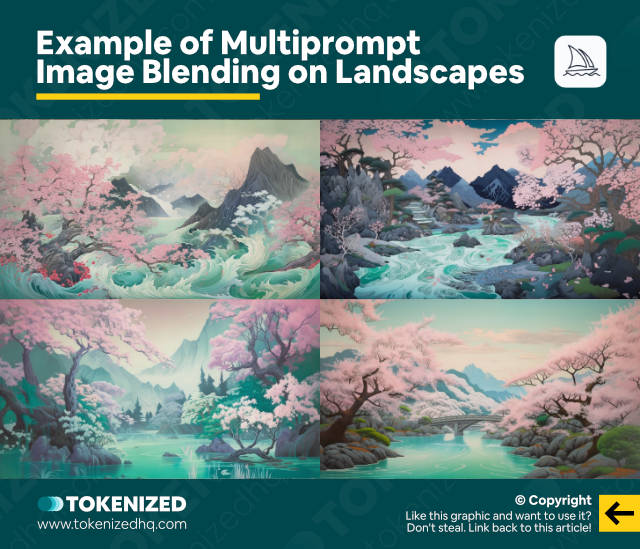
So they will eventually turn into this beautiful work of art, or something like this if you play around with the weights.
As you can see, the possibilities are limitless, and rather than sticking to the relatively simplistic approach of just blending 2 images, consider using some of the methods I showed you today.
Frequently Asked Questions (FAQ)
Before we close off this guide, let’s quickly address some of the most common questions related to Multiprompt Image Blending and Blended Reverse Engineering.
-
What is Blended Reverse Engineering in Midjourney?
Regular image blending in Midjourney can sometimes produce images that contain malformed objects or other artifacts. Blended Reverse Engineering is a term that was first coined by Christian Heidorn. When you feed your initial (but imperfect) blending result into the
/describecommand and then use the starter prompts to generate a crisper interpretation purely based on a text prompt. The blended concept remains intact. -
What is Multiprompt Image Blending in Midjourney?
Rather than blending two images as image prompts, Multiprompt Image Blending uses the
/describecommand to generate starter prompts for each image. These are then combined into a multiprompt. This process is often more effective and also provides more control over the final image due to the availability of weights and the ability to adjust text prompts where necessary. This is another process that was first publicly shared by Christian Heidorn.
Conclusion
As you can see, with every new feature that Midjourney releases, the array of potential prompting methods just keeps on growing.
By expanding your toolset beyond the basics of prompting, you have far more options at your disposal when trying to create a specific image.
Neither blending nor reverse engineering is necessarily a one-way street.
Here at Tokenized, we want to help you learn as much as possible about the AI software industry. We help you navigate the world of tech and the digitalization of our society at large, including the tokenization of assets and services.


