Trying to install and run Stable Diffusion locally on your Mac?
Maybe you recently tried setting up Invoke AI only to realize that it still doesn’t support Stable Diffusion 2.
Even though its UI isn’t as slick that the one from Invoke AI, you’ll be glad to hear that the installation process for the AUTOMATIC1111 is a lot more straightforward.
In this guide, we’ll show you step-by-step how to install Stable Diffusion on macOS using the AUTOMATIC1111 distro.
Let’s dive right in.
Table of Contents Show
Like this content? Then share it!
How to Install Stable Diffusion on macOS via AUTOMATIC1111
www.tokenizedhq.com
Here’s the answer. Great article by @ChrisHeidorn right here: https://tokenizedhq.com/how-to-install-stable-diffusion-macos-automatic1111/
Brief Overview of How to Install Stable Diffusion on macOS

I’m going to assume there are 3 potential ways that you found this guide.
Either you came here straight from Google or you read one of my other 2 guides on how to install Stable Diffusion on macOS.
- The first one covers how pretty much anyone with an M1/M2 Mac can get Stable Diffusion up and running within minutes by simply installing Diffusion Bee.
- The second one is more elaborate and tries to walk you through all of the necessary steps to install Invoke AI on your system.
I must admit that despite the fact that Invoke AI clearly has a more advanced and visually appealing user interface, its lack of support for Stable Diffusion 2 is pretty disappointing.
Add in the fact that its installation process is cumbersome, prone to errors, and can take quite a long time.
That’s why I’ve decided to create this write-up on how to install AUTOMATIC1111 as well.
It is the other incredibly popular WebUI for Stable Diffusion, with the added benefit of supporting v2 and also being much easier to install.
However, before we get into the nitty-gritty details, let’s make sure that you’ve got some pre-requirements covered.
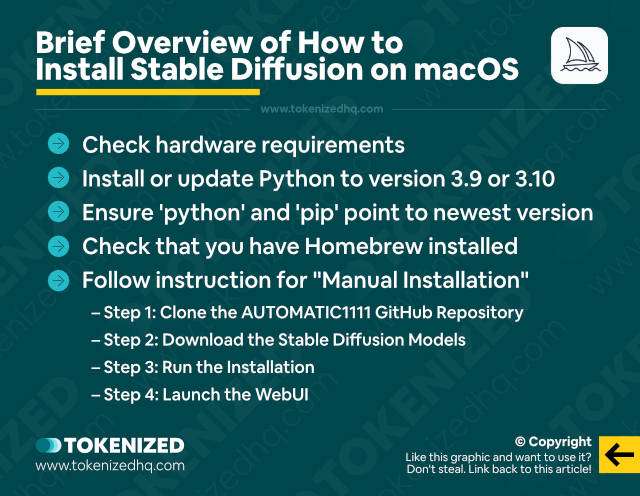
- Check whether your system actually meets all the hardware requirements for Stable Diffusion.
- Also, make sure you’ve installed and updated your Python version to a recent version. I recommend sticking to 3.10 for now (this guide is quite useful)
- Ensure that your
pythonandpipaliases are pointing topython3andpip3. The guide I linked above includes instructions on doing this if you do not know how. - Check that you’ve installed Homebrew on your system.
Unlike Invoke AI, there aren’t multiple different ways of installing it.
Ironically, what was meant to make Invoke AI more approachable, actually ends up making it more complicated.
To install AUTOMATIC1111 you really only have a single option: The command line interface.
So let’s get started.
Key Points (tl;dr)
- Make sure your system actually meets the Stable Diffusion hardware requirements.
- Check your Python version and upgrade to 3.10 if necessary.
- Clone the AUTOMATIC1111 GitHub repository, launch the WebUI installer and follow the instructions on the screen.
Manual Installation of AUTOMATIC1111 Stable Diffusion

At this point, I am going to assume that you are reasonably familiar with the command line and that you know what Git is and how it works (roughly!).
I’m also going to assume that you’ve checked the pre-requirements mentioned earlier in this guide.
Step 1: Clone the AUTOMATIC1111 GitHub Repository
Open the terminal window of your choice and simply enter the following command:
git clone https://github.com/AUTOMATIC1111/stable-diffusion-webuiThis will download the latest version of the repository on GitHub and create a local folder called “stable-diffusion-webui“.
Technically, you can do this in any folder but I recommend sticking to your home directory for now (~/).
Step 2: Download the Stable Diffusion Models
Next, visit this page and download the Stable Diffusion models that you want to use.
The page also contains additional instructions on what you need to do, so please pay attention to those details.
Personally, I was only interested in Stable Diffusion 2, so here’s what I did.
I downloaded the “v2-1_768-ema-pruned.ckpt” file (click here to download) as well as the associated configuration file “v2-inference-v.yaml” (click here to download).
Then rename the “v2-inference-v.yaml” file to “v2-1_768-ema-pruned.yaml” so it has the same name as the model.
Next, move both files into the “stable-diffusion-webui/models/Stable-diffusion” folder.
Step 3: Run the Installation
You’re now ready to install AUTOMATIC1111 by first entering the folder via the command line:
cd stable-diffusion-webuiAnd then you can simply run the main “webui.sh” script:
./webui.shThis will create a Python virtual environment and any missing dependencies will be automatically downloaded and installed.
This process may take a while, so please be patient.
Step 4: Launch the WebUI
When you run the “webui.sh” script for the first time, once it has finished installing all dependencies, it will automatically launch the local web server.
You can then access the AUTOMATIC1111 WebUI by opening the following link in your browser (your port may be different).
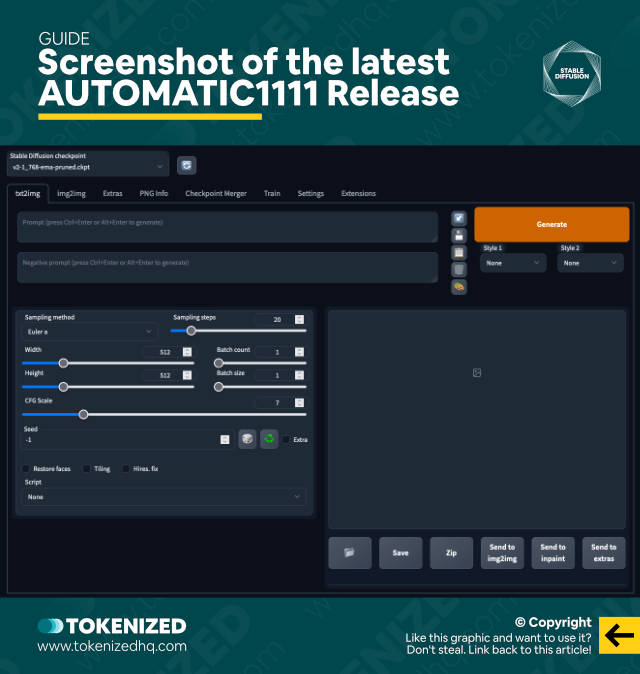
http://127.0.0.1:7860You’ll notice that the user interface isn’t as slick as what you may have seen with Invoke AI.
However, in the greater scheme of things, the layout is pretty unimportant.
Anyway, you’re now ready to start creating AI art with Stable Diffusion!
Frequently Asked Questions (FAQ)
Before we close off this guide, let’s quickly address some of the most common questions on how to install Stable Diffusion on macOS via AUTOMATIC1111.
-
What is AUTOMATIC1111?
AUTOMATIC1111 is an implementation of the AI art generator Stable Diffusion. Since Stable Diffusion is open-source, anyone can modify and improve upon its code and create their own variant of it. This is very similar to what is done with various different Linux distributions such as Ubuntu, Redhat, and many more.
-
How do I use AUTOMATIC1111 SD WebUI?
After following the instructions to install AUTOMATIC1111 on your local Mac, you can launch the WebUI by switching to the “
stable-diffusion-webui” directory and then running “./webui.sh” via the command line. This will start a local web server that you can access via your browser. -
Is AUTOMATIC1111 better than Invoke AI?
It mostly depends on what is important to you. Invoke AI has a much prettier interface, while AUTOMATIC1111 is generally easier to install. Invoke AI also still does not support Stable Diffusion 2, while AUTOMATIC1111 does.
Conclusion
Once people found out that M1/M2 MacBooks are able to run Stable Diffusion, the number of searches on how to install Stable Diffusion on macOS skyrocketed.
Some wanted to install AUTOMATIC1111, while others were looking to get Invoke AI up and running.
While we love the Invoke AI interface, its lack of support for SD 2.0 and the cumbersome installation process is a pretty big turn-off and the primary reason why we currently recommend you install AUTOMATIC1111.
Here at Tokenized, we want to help you learn as much as possible about the AI software industry. We help you navigate the world of tech and the digitalization of our society at large, including the tokenization of assets and services.


