So you’re trying to figure out how to accept offer on OpenSea?
Maybe this is the very first time you’ve actually received an offer on one of your NFTs but you have no idea how to accept it?
Well, this is a common and recurring issue amongst many newbies in the NFT space.
Receiving an offer is one thing, but unless you know where to hit the “Accept” button the offer you received is pretty much worthless.
In this article, you’ll learn exactly how to accept offers on OpenSea as well as what sort of gas fees you might be confronted with.
Let’s get down to business.
Key Points (tl;dr)
- Accepting an offer on OpenSea is a relatively straightforward process.
- You can see the offers you’ve received either directly on the item’s page or within the “Offers” section of your profile.
- To accept an offer, click the “Accept” button and review the terms of the deal. If you are happy with the price, click “Accept” again and confirm the transaction with your wallet.
- Once the transaction is confirmed, the NFT is transfered to the buyer and the sales price (minus fees) is transfered into your wallet.
Like this content? Then share it!
How to Accept Offer on OpenSea the Right Way
www.tokenizedhq.com
Here’s the answer. Great article by @ChrisHeidorn right here: https://tokenizedhq.com/how-to-accept-offer-on-opensea/
How to Accept Offer on OpenSea
You can accept an offer on OpenSea by opening the item’s page, clicking on the offer’s “Accept” button, reviewing the terms, and finally confirming by clicking the “Accept” button again. Make sure you have ETH in your wallet because the seller pays for gas when accepting a bid.
Accepting an offer on OpenSea might sound like a relatively easy thing to do and for the most part, you are right.
However, not everyone is super familiar with the OpenSea user interface and knows how to accept offer on OpenSea.
Although I do believe that it’s one of the more intuitive interfaces that you’ll find in the NFT space, occasional bugs can drive you absolutely insane.
In some cases offers simply won’t be displayed or the button to accept might be missing.
And in these kinds of situations, it’s crucial that you know where else to look.
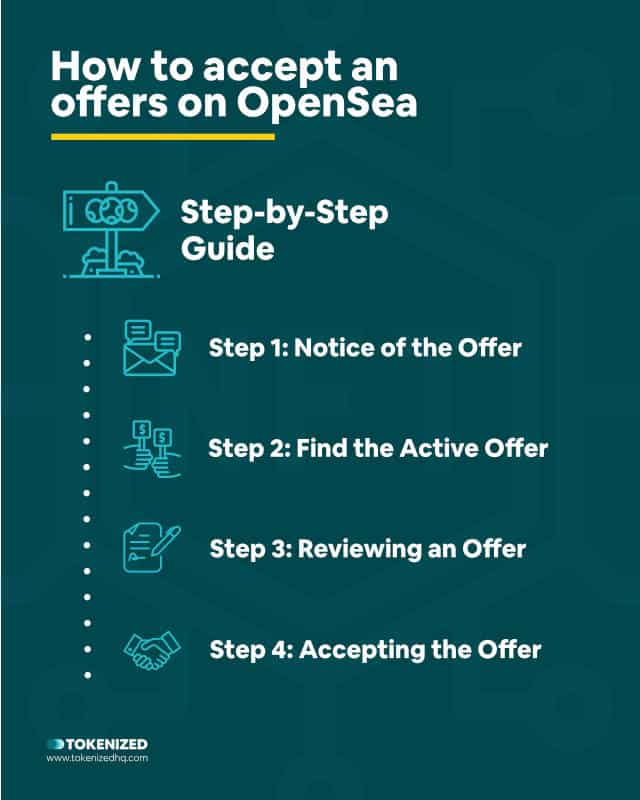
We’ve put together the following step-by-step guide to help you learn how to accept offer on OpenSea.
Step 1: Notice of the Offer
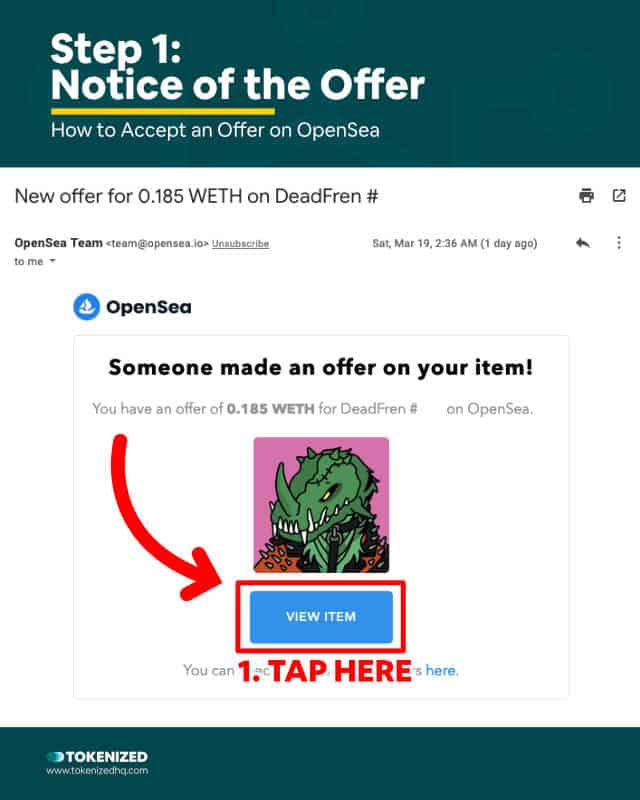
Most of the time you’ll notice that someone has made an offer on your NFT because you’ve received an email notification.
However, this only happens if you’ve saved your email address in your OpenSea profile.
If you haven’t added an email address then you won’t receive these notifications and will only notice offers once you see them live on the OpenSea website.
Another reason you might not receive all notification emails is that you may have certain thresholds within your account’s settings.
Anyway, once you receive such a notification you can click on the button in the email to view the NFT’s item page.
And that’s the point at which you’ll need to know how to accept offer on OpenSea.
Step 2: Find the Active Offer
Bear in mind that offers usually come with an expiration date.
So even though you might still have the email in your inbox, it’s entirely possible that by the time you open the item’s page, the offer may have already expired.
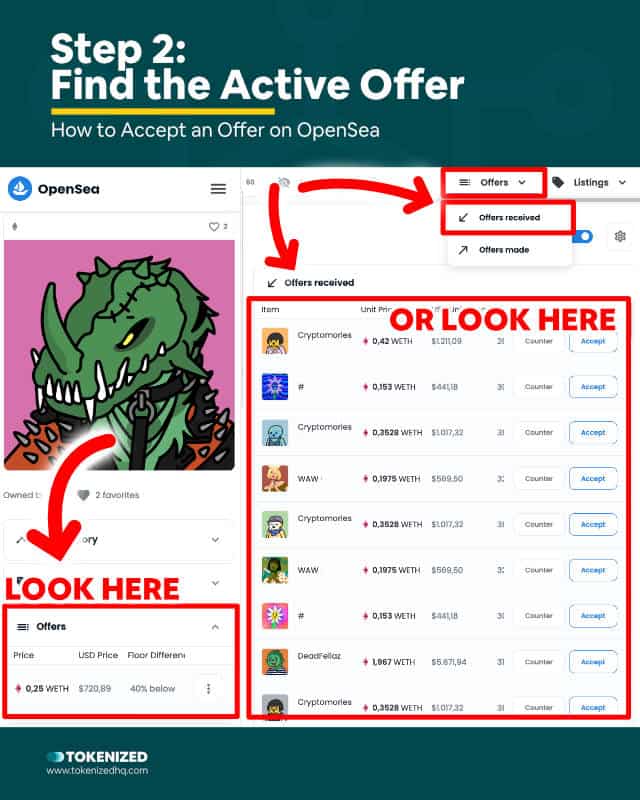
There are two different locations where you can see offers on your NFTs and from where you can also accept them.
- The first location is directly on the item’s page inside the “Offers” box.
- The second location is inside your profile under the “Offers > Offers received” tab.
This is also where you can see all of the different offers you may have received on your NFTs.
The table tells you what the offer price is and how much it is above or below the current OpenSea floor price.
Step 3: Reviewing an Offer
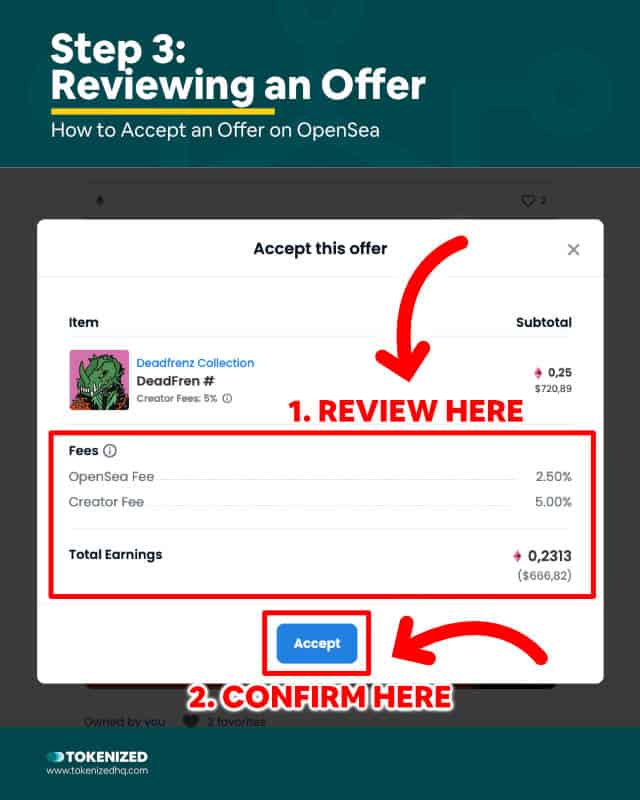
If you’re considering accepting an offer, make sure you verify what your total earnings would be.
Cause knowing how to accept offer on OpenSea is one thing, but ensuring that you’re actually making a profit is an entirely different story.
You can do this by clicking on the “Accept” button.
Don’t worry, this doesn’t actually complete the transaction.
It just opens a pop-up window that summarizes the terms of the offer, including listing the different fees you’ll have to pay.
Usually, this includes OpenSea fees of 2.5% (service fees) as well as a creator royalty between 0% and 10%.
There are also some other “hidden” fees but more on that later.
If you like the terms of the deal, you can click the “Accept” button.
Step 4: Accepting the Offer
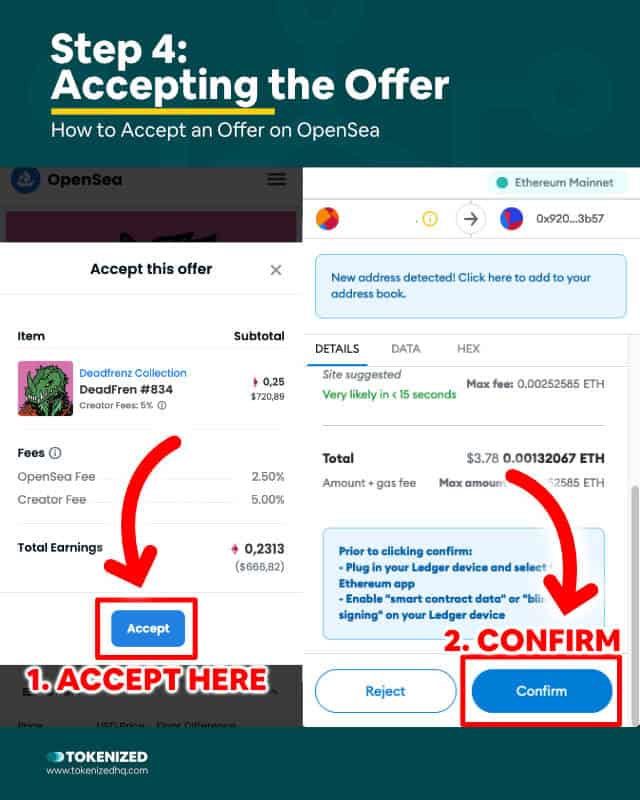
If you hit the “Accept” button, then this means that you’re happy with the terms that you were presented with.
Congratulations, you’re one step closer to making your first sale.
But you’re not quite there yet because you need to confirm the transaction with your wallet first.
And yes, that means you’re going to have to have to pay for gas.
When you list an item at a fixed price and someone buys it directly, the buyer pays for gas.
However, if someone just makes an offer and the seller chooses to accept it, the gas fees are paid by the seller.
The only way for both sides to avoid the gas fees is if the seller launches a time auction with a reserve price.
In that case, the gas fees are paid by OpenSea.
Conclusion
So now that you’ve learned how to accept offer on OpenSea, you’ll know exactly what to do next time you receive an email notification.
If it’s a really good offer then you may have to act quickly to prevent it from expiring ahead of time.
And always remember that in order to accept an offer, you’ll need to have ETH in your wallet in order to pay for gas.
It would be a pity if you knew how to accept offer on OpenSea but didn’t have the necessary gas to accept it.
Here at Tokenized, we want to help you learn as much as possible about the coming NFT revolution. We help you navigate this fascinating new world of non-fungible tokens and show you how you can integrate tokenization into your own business.


